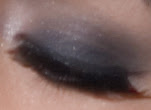
Creating the perfect smokey eye can be a tricky for a novice makeup user, but it doesn't have to be that hard. As long as you have the right tools and instructions you'll be a pro in no time. The picture to the left is a smokey eye I did on a friend for her promo pictures who's an aspiring jazz singer. She wanted a very sultry, smokey eye with big lashes. To achieve this look, I created the classic smokey eye using champagnes, charcoal grays, and blacks. However, the smokey eye doesn't have to be limited to black. I love using deep purples, emerald greens, bronzy browns and navy as well. Alright, lets get started!
Tools:
Brushes are key elements to creating any flawless look especially the smokey eye. If you don't own any brushes, I would definitely go out and buy some. They're good investments and will last you forever with proper care. All the brushes I own are from MAC, but feel free to find the right ones for you. If you can't afford to buy high quality brushes right away, the make-up brand Quo, Shoppers Drug Mart's home cosmetic line has quality brushes at affordable prices. I use a total of 4 brushes for this look: #208 brush for lining and smudging, #217 brush for contouring and shading, the #224 brush for blending, and the #239 brush for shading and applying emollient based products.
To recreate:
1. Always start with a clean fresh face. I also always prep the eye area with eye cream. A smooth base will make applying the eye shadows that much easier.
2. A smokey eye can get messy. What I usually do is apply the foundation and powder only around the upper lid and lower lash line and leave the rest of the face for last. Or you can do what most people do and apply loads of loose powder under the eye with a powder brush. Once you're done you can dust it away.
3. You always want to make sure your eyeshadow will last all night, all day whatever the case may be. Before applying any shadow I like to use MAC's Eye Paints as a base. My favourites to use are Bare Canvas (champagne with shimmer), untitled (light toned grey mauve), Sublime Nature (beige), and Bamboom (beige/brown with golden shimmer great for darker skin tones). The Paints are crease resistant and will help keep your shadow on longer. Apply a small amount from lash line to brow bone with your ring finger or the #239 brush.
4. I then used Shroom eyeshadow a soft golden beige with shimmer to high light under the brow bone and in the inner corner of the eye using the #217 brush. Next, I smudged MAC's Shadestick in Sharkskin (charcoal grey) into the lash line from inner to outer and shaded the eye lid up until the crease bone. I then took my #239 brush and blended the colour out to take away any harsh lines. If you're not sure how to blend with a brush it's basically running the brush back and forth across your eye. The Shadestick is a cream based shadow and I used this first before applying a powder shadow to make the colour more intense and vibrant. It also helps the shadow stay on longer.
5. Using the #239 brush, I applied Carbon eyeshadow a matte black, onto the lid by gently patting it onto the eye. I find patting it on the lid creates less fall off onto the face. You can apply as little or as much shadow depending on the intensity you want. Since it was for a photograph, I applied a lot of the Carbon and also took my #217 brush to contour in the crease area. Your crease is usually where your crease bone is. Some people find shading the crease area to be difficult but a little trick you can use is pretending your drawing a half moon. Start at the center of the eye and bring it out to the outer part of your eye.
I used Shroom again with my #217 brush in the crease to blend the two colours together and to ensure there were no harsh lines between the brow bone and the crease. I then took the #224 blending brush (it's always good to have a clean blending brush on hand free of any eye shadow colours) and blended the whole eye area to give it an airbrushed effect. I usually like to blend as I go along but you can leave it last and do it all at once.
6. I then used my #208 brush and lined the lower lash line with Carbon. If you have smaller eyes skip this step or just line the outer part. I actually find that liner the lower lash line makes smaller eyes stand out more than not lining it. It gives it more definition, but try it and see what works for you. You can take a Q-tip and smudge the line to smoke it out. Since I used fake lashes on my friend, I used a different liner on the top. I love using MAC's Fluidline in Blacktrack with my #208 brush. It goes on like a liquid liner but has a softer finish which is perfect for a smokey eye. I extended the liner a bit past her eye to give her a "winged out" effect to emphasize the fake lashes. To wing out your liner, hold the side of your temple taut and up and follow the line with your brush. It takes some practice, but it gets easier. Instead of drawing a solid line all the way across the lid, I like to use small strokes to ensure proper definition and to avoid mistakes.
7. You can skip this step if you're not using fake lashes. Now that I have lined the upper lash line, I have created a guideline to help me apply the fake lashes. If you have applied the lashes on top of the line then you have applied the lashes wrong. The whole purpose of the line is to see it. Before applying the lashes, curl your own lashes with a lash curler. Take the fake lashes out of the box by pressing down and out starting on one end, then the center, and then the other end with your thumb on the lash. Never pull the lashes out or you will end up tearing the hairs out. I usually test the lashes on the model's eye before actually gluing it. This way you can determine if it needs to be cut or not.
To apply the glue I like to use a toothpick or a metal spatula. Apply the glue on the lash line (use more glue on the outer edges as it typically lifts there first) and wait until the glue is tacky before applying to your eye. This will help it adhere better. The lashes will be applied at the base of the lash. Remember to use your liner as a guideline. Using tweezers or your fingers if you're a pro, apply the lashes starting at the center, then pressing on one side and then the other. It make take a few tries if doing it by yourself so if you need to restart just apply a bit more glue on the ends again.
Once you're done, look up and from side to side. If you can't open your eye then glue has gotten onto your lashes. Just take a bit of eye makeup remover on a Q-tip and run it over the area. If you feel a stabbing pain in the inner corner, then you have applied the lashes too far in. Give it a little tug towards the outer corner. You'll still have a bit of time before the glue completely sets.
8. Apply lots of mascara on the top and bottom lashes. I then relined her lash line to hide the fake lashes.
9. To finish off the look and to give her more shimmer I used MAC's Mineralize Skinfinish in Shimpagne on the inner corner of the eye, brow bone, cheekbone, temples, and above her lip. Bronzer was used in the hollows of her cheeks.
10. To offset a smokey eye, I like to use a pale glossy lip. I lined her lips with MAC's Stripdown, a nude beige and applied MAC's Plushglass in Wildly Lush, a nude apricot over top.

Here is the final shot.
And voila! Your smokey eye is complete! Yeah, you did it! Now it wasn't too hard was it?? There are many ways to do a smokey eye whether it be precise like the above or by simply smudging black eye khol with your finger. Whatever way you choose have fun with it!
Copyright James Tilberg, MU: Joy David, Model: Christine

4 comments:
Great tip! And the result is stunning...
Hi!! Love your makeup 101 on smokey eye.. and i love your blogs!! keep 'em coming!
*take care*
Thanks Joanne! I tried going to your page but it wasn't loading properly. Come back any time and thanks for the feedback! Much appreciated!
Joy, you're really great! I love reading this...I'll never be able to do it myself, but I really like the way you detail and describe the make up process...somehow I find it extrememly relaxing to read your blog!
Post a Comment